Window Installation Waukesha WI is a major home improvement project that requires extensive preparation to ensure a smooth and clean process. You should clear the area of any furniture or wall decorations to give the installers easy access and prevent tripping hazards.
Properly installed windows prevent water infiltration and damage to the walls and structure. This article covers how to prepare for and complete a window replacement project, ensuring proper insulation and a strong seal.
Before a window is installed, it’s important that the installer be able to access the area around it easily. This means taking down any curtains or blinds hanging from the window, and moving furniture from in front of it. This is not just about making room for the installers to work, but also protecting your possessions from dust and construction debris that can cause them harm.
Thorough cleaning of the window opening is also recommended, to prevent the formation of so-called thermal bridges – cracks through which heat escapes. This also helps the sealing materials adhere better. The insulation that’s put in place during the installation should be matched to your specific needs, and a qualified installer can help you make the best choice.
A thorough inspection of the new window is another must, both during and after its installation. If the window doesn’t fit correctly, it can lead to moisture seepage, resulting in water damage and mould. This can be very costly, especially in older homes that may have weakened walls.
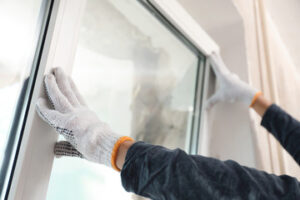
When a new window is properly installed, it must sit squarely in the frame, with proper verticals and horizontals. It should also be centered in the opening, using shims where necessary. Once the window is in place, it should be nailed through its nailing fin to ensure that it will not warp over time.
Ideally, the installation should be completed before the weather turns colder, so that the insulation can keep the windows’ frames warm. It’s also a good idea to seal the exterior of the frame with caulking, as this will further help it keep in the warmth.
Finally, be sure to remove all electrical wiring located near the window before it’s replaced, and to disconnect any security sensors or alarms that are nearby. This is to ensure that the installer can complete their job without being interrupted by a tripping hazard or an unnecessary call to the police. This is particularly important if you have children and pets, who should be kept away from the work site to maintain their safety and protect them from being injured by flying tools or falling debris.
Removal
A skilled window replacement team can transform your home, allowing you to enjoy a more comfortable environment and add curb appeal to your property. However, if you’re considering doing the job yourself, there are several key things to keep in mind to ensure a smooth project.
First, make sure you clear the area. Remove any furniture or other items that could get dirty from dust or broken glass, and cover them with thick sheets. This will prevent them from getting damaged or ruined during the removal process. You should also put weights on the sheets; large books or furniture pieces work well. This will help secure them to the floor, preventing them from sliding around while you’re working on the windows.
Once you’ve cleared the workspace, you can begin removing the old window. This can be a time-consuming task, but it’s important to take your time and be careful not to damage the frame or wall. You should also wear protective gear like rubber gloves and safety glasses to prevent any injuries.
Depending on the type of window you have, the method for removal will vary. Some windows use removal clips, which are metal clips on the sides of the frame that hold the sash in place. Others use tilt latches, which are sliding latches on the top of the window sash. If your window has tilt latches, you’ll need to open them before you can pull out the sash.
Other types of windows use a flexible mesh screen that’s held in place by a thin strip of vinyl or metal called a spline. In order to remove this type of screen, you’ll need a spline tool, which is available at most hardware stores.
After you’ve removed the window, make sure the takeout clips and sash stops are securely reinstalled. This will ensure the window is properly sealed and prevent air and water from entering your home. In addition, you should check the balance system and sash lock to make sure they’re in good working condition. If they’re not, replacing them will be necessary to prevent leaky windows and high heating and cooling costs.
Installation
The window installation process can be difficult for homeowners. It is important to follow the right steps to ensure a professional and high-quality finished product. A well-installed window will maximize thermal retention, minimize potential moisture infiltration, and look great for years to come.
Before starting the installation, make sure to clear the work area and remove any furniture that could be in the way. This will ensure a safe and efficient workspace for the window replacement crew. Additionally, it will help prevent any debris or mud from getting on the new windows.
Once the work area is cleared, it’s time to start the measurements. First, measure the width of the old window opening from the inside. Then, take three vertical measurements – one from the top called the head jamb, one in the middle, and one at the bottom called the sill. Use the smallest measurement as your width size.
Next, you will need to determine the height of the window opening. To do this, you will need to move the sash out of the way. You will need to measure the length from the inside of the frame at the left, center, and right. Choose the shortest of these three measurements as your height size.
The next step in the window installation process is to prepare the framing. It is important to check for rot or mildew in the wood, and replace any damaged parts. It is also important to make sure that the framing is square and level. If the walls are uneven, it can cause the new window to be misaligned and may not seal properly.
If you want to be even more thorough, you can use a laser measure for more accurate measurements. This tool will allow you to measure the space from any angle, and it will be especially helpful for difficult-to-reach areas.
Once the measurements are taken, it is time to install the new window. The window will need to be cut to fit the opening, and it will need to be sanded down so that it is flush with the frame. Finally, the window will need to be caulked and sealed. Be sure to use low-expanding caulking to ensure a tight seal and avoid any leaks.
Maintenance
The installation process is a meticulous affair, requiring the skill of professionals to ensure a perfect fit and optimal energy efficiency. The team starts by carefully removing the interior stop molding, then sash, and finally frame. Taking care to preserve any materials that can be reused, the space is then prepared for the new window. A tight seal is essential, and shims are used to adjust the fit as needed. After the new windows are set in place, the installers caulk around the frame to prevent air leakage.
Water damage is a common problem for poorly installed windows, as moisture can seep in and cause mold, mildew, and warped framed walls. This is not only unsightly, but it can lead to the structural damage that requires a costly replacement. This is why it’s so important to inspect your home windows regularly for water damage, as even a minor issue can escalate quickly.
Window maintenance includes keeping weep holes clear of debris to allow the free flow of rainwater; cleaning and lubricating window tracks; and inspecting hardware and weatherstripping. Regular maintenance will prolong the life of your ProVia windows and keep them looking beautiful and functioning properly.
When lubricating your window track, it is best to use silicone lubricant, as oil-based lubricants promote the buildup of dirt and grime. You can also use a toothbrush to scrub away any built-up gunk. If your windows are hard to open and close, you can try adding a bit of spline lubricant to the sash cord, but make sure to follow any manufacturer instructions to avoid voiding your warranty or damaging your window.
In addition to a thorough inspection, it’s important to check the condition of your window frames periodically for any cracks or gaps that need to be filled with caulk. This will help reduce the risk of water damage, save money on utility bills, and protect your home from the elements. A crack or gap in the caulking may seem insignificant, but it can let in cold air and moisture that can cause wood rot and structural damage over time.